
NDES and SCEP setup for Intune- A Complete Guide!
In this post, we shall get a complete overview on how to setup NDES and SCEP for certificate deployment via Intune

My name is Saurabh Sarkar and I am an Intune engineer in Microsoft. I have a YouTube channel ‘EverythingAboutIntune’ and you can subscribe to the same to learn more about Microsoft Intune.
Brief Background: The concept of using certificates
For any user to access any application, he has to go through 2 phase-
Authentication phase and Authorization phase.
- Authentication phase- User’s authenticity is checked (if the user is, who he claims to be).
- Authorization Phase- User is subjected to some conditions, and depending on the output we determine whether the user should be given access or not.
- Conventionally authentication may that be to an App,Wifi,Vpn etc is done by username/password.
- However to make this more seamless we introduced the concept of using a certificate for facilitating the authentication.
- Via Intune we can push 2 kinds of certificate to devices viz PKCS and SCEP
Kindly go through my below post which explains the difference and similarities between PKCS and SCEP and recommends on which one to use and when-
Now this article is a complete guide illustrating each step involved in a NDES and SCEP setup from Intune. The entire demonstration of this post can be found below-
Setting up NDES and SCEP
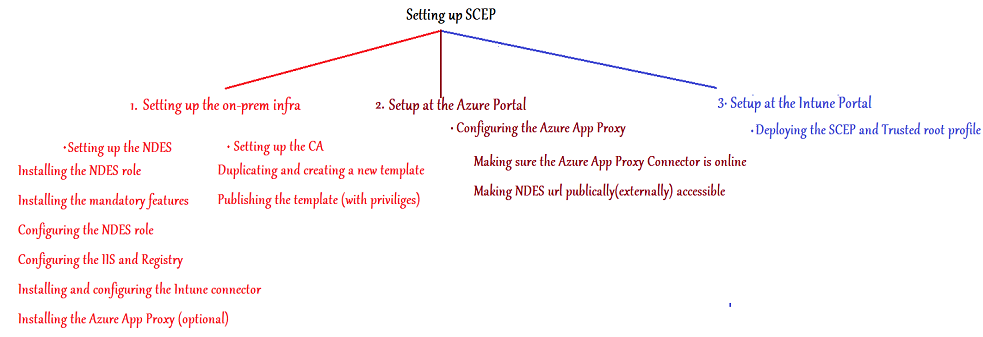
As illustrated in the figure above,we will setup our SCEP deployment in 3 phases: (Refer to the relevant color coding)
Phase 1- Setting up the on-prem infra
This in turn has 2 segregation viz-
Setting up the CA
Setting up the NDES
Phase 2- Setup at the Azure portal
Phase 3- Setup at the Intune portal
Phase 1- Setting up the on-prem infra
As illustrated in the diagram, we have to setup 2 components in the Phase 1 (i.e. on-prem infra setup)
The CA and the NDES. Lets begin with the CA first.
Setting up the CA:
There are 2 main tasks we have to achieve in the CA as discussed below.
1- Duplicating and creating a new Certificate Template
Firstly we have to create a template in the CA.
The main use of this template is- issuing certificates to the end users/devices.
NOTE- It is incumbent that we create the certificate template with caution as, the attributes of the certificate template is going to determine the attributes of the certificate that it issues(which eventually the end user receives)
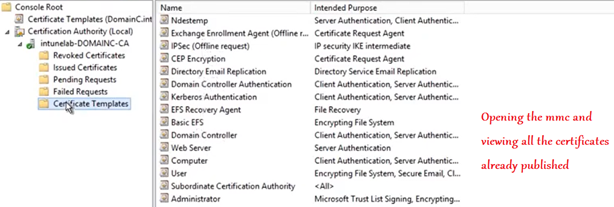
Now the easiest way of creating a new certificate template is by duplicating it from an existing one.
We can duplicate from the existing “User” template.
Note: The new template created from the user template can be used to issue certificates to users as well as to devices.

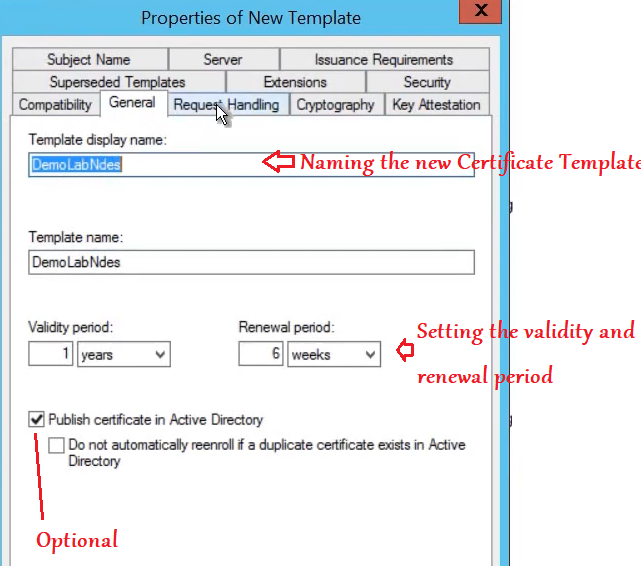
In the General tab we have to-
Name the certificate template:- Lets not put any spaces in the template name to ensure the Template Name and Template display name(which removes the space characters automatically) both are the same.
Validity Period:- Lets set the validity period. This is going to be the validity of the certs that the end users/devices receive. (This has to be same as what we set in the Intune SCEP profile as well, later)
Publish Certificate in AD:- This is an optional selection. If selected, we can see all the certs issued in the AD by using the service account.
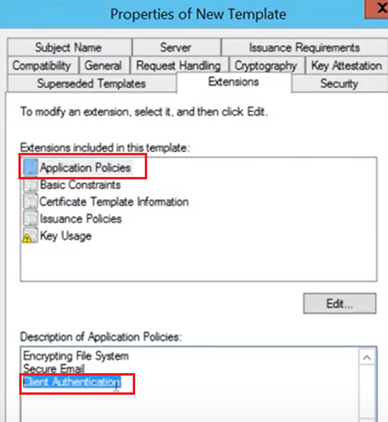
In the Extension Tab,
While clicking on Application policies lets make sure that we see “Client Authentication” EKU.
(If we duplicated this template from any other source other than “User”, then this might not be present and we would have to add it here).
This is important because, only if this template has the Client Auth EKU, the certificates issued by it to the end devices will have the Client Auth EKU, which is needed for the users/devices as the Client needs to prove its Authenticity.
Now under the same tab, we need to click on “Key Usage” and make a note of the “Signature Requirements” ((This has to be same as what we set in the Intune SCEP profile as well, later)
Possible values here: Digital Signature, Key Encipherment or both.
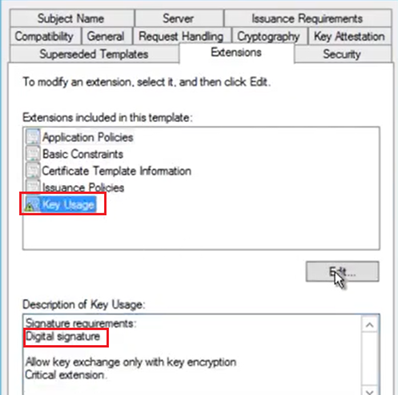
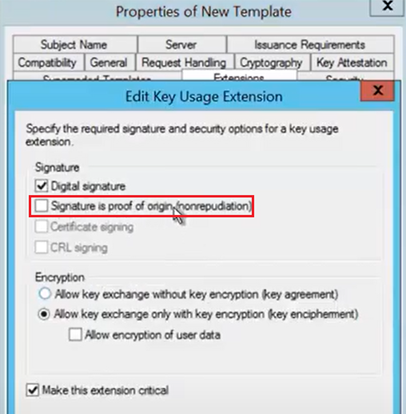
If we plan on deploying certificates to iOS/macOS devices as well from Intune, then we have to make sure that in the same tab i.e. Extensions Tab>Key Usage>Edit> “Signature is Proof of Origin” is unchecked, Rest set to default as below.
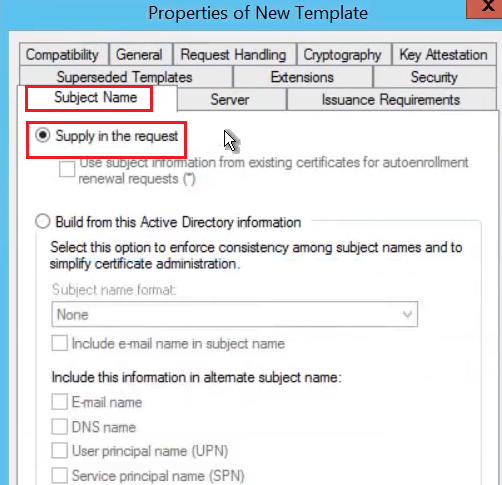
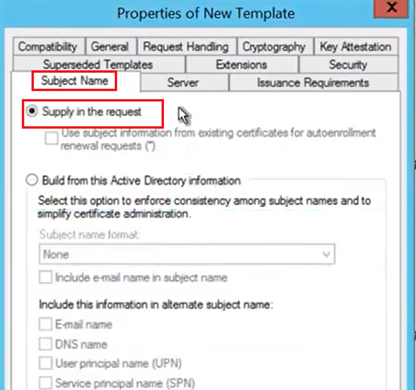
In the Subject Name tab, we are going to-
Select the option, “Supply in the Request”.
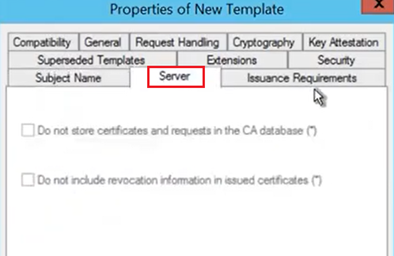
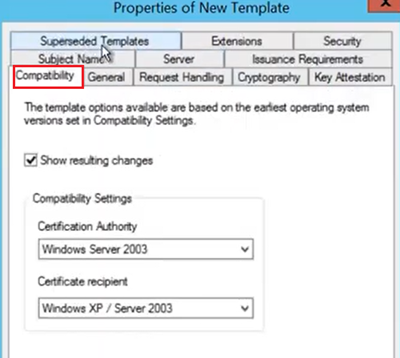
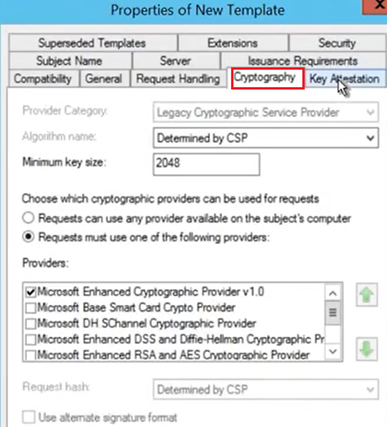
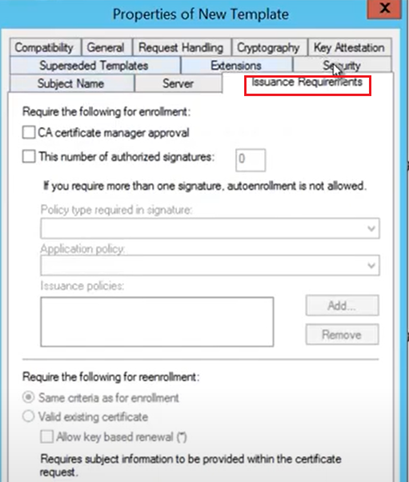
In the Server , Compatibility, Cryptography, Key Attestation and Issuance Requirement tab we can leave things as default which should look like the below

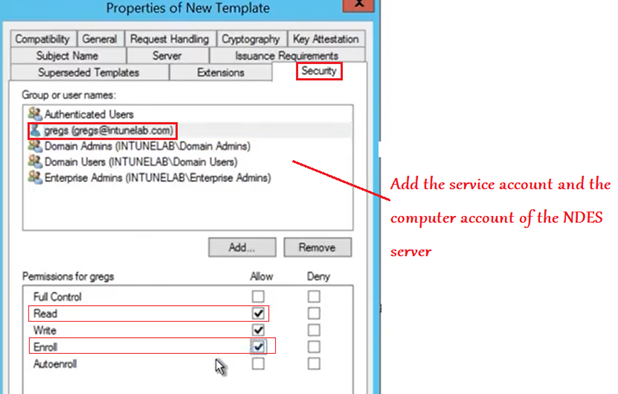
In the Security tab, we will add the NDES service account and the Computer account with Read and Enroll permission.
(If not created already, then kindly create a NDES service account for this purpose which makes the management more streamlined).
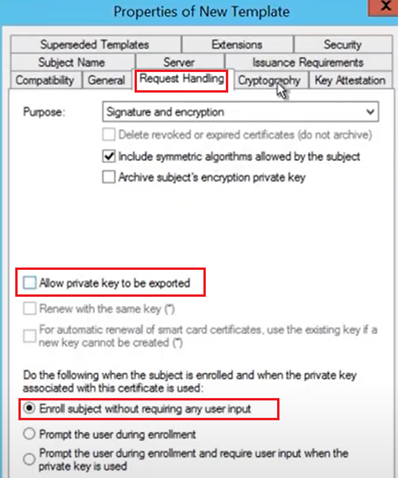
In the Request Handling Tab, we have to uncheck the option, “Allow Private Key to be exported”.
This has to be done because in case of a SCEP certificate the private key is NOT marked as exportable.
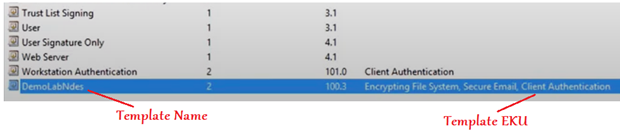
Now the Certificate template should be created and visible as below-
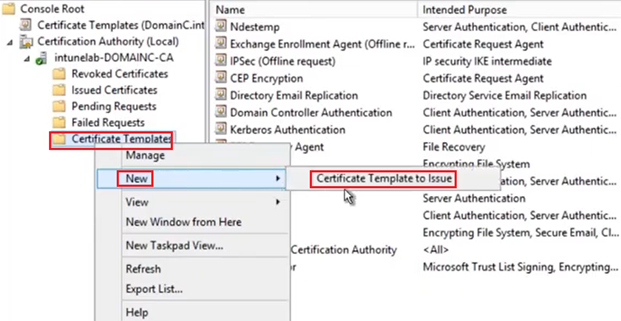
#2- Publishing the Certificate template:
The new certificate template is now ready. All that needs to be done is, it needs to be published. We cannot issue certificates from a template unless it has been issued.

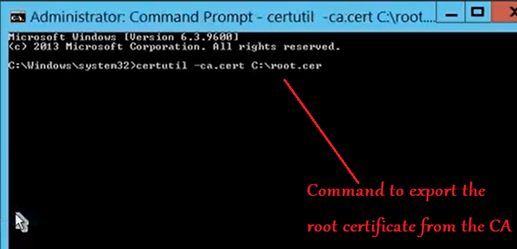
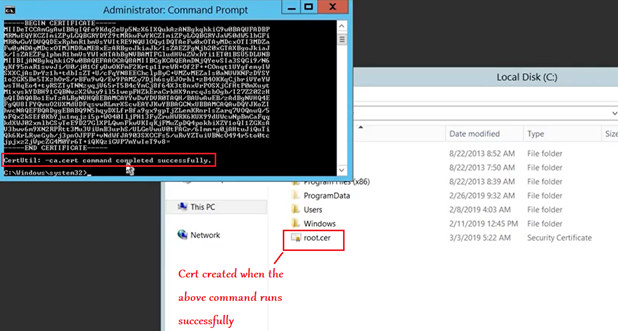
Now the last thing we need to do in the CA is export the root certificate. This root certificate is needed to create a Trusted root profile in Intune and is used for chain building. (it is not responsible for any authentication)
Setting up the NDES
The first thing we have to do is-
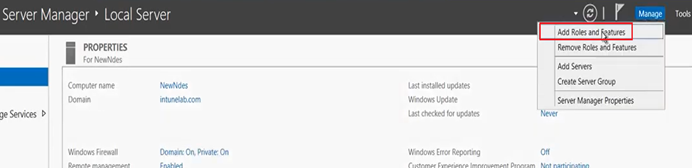
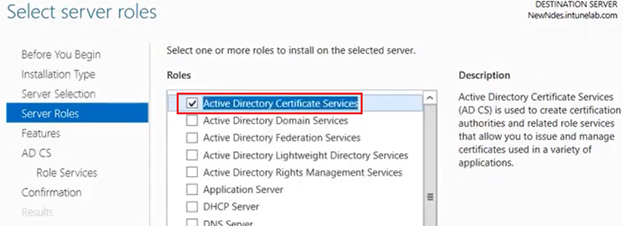
Add the NDES role to the server (part of ADCS) from the server manager.
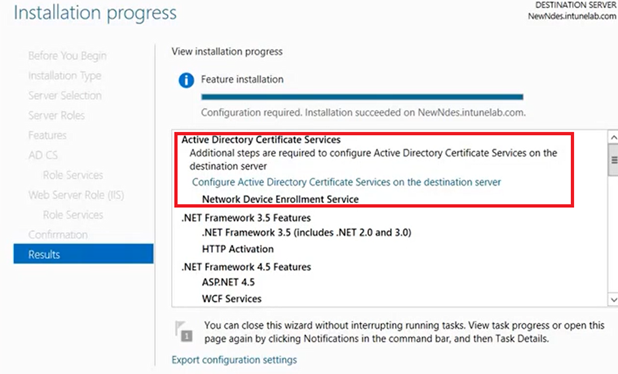
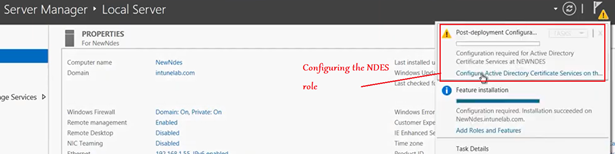
Once installed, now when we open the server manager, we see the option to configure the NDES role.
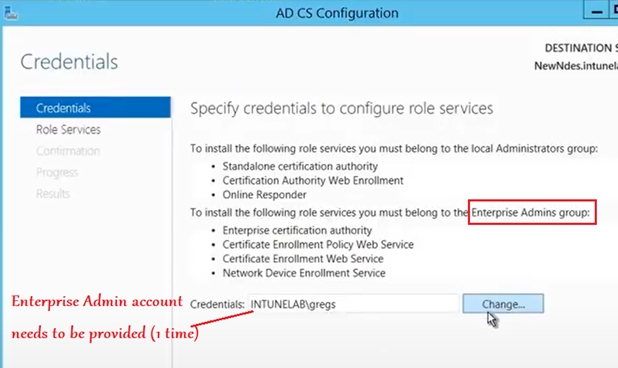
First we need to provide the credentials of an Enterprise Admin account.
This is a 1 time requirement and even if the password of this account changes later, that has no impact.
Now we need to select the “NDES” role from the check box.

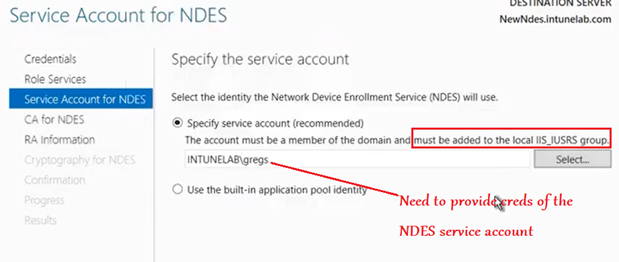
Now we have to provide creds of a service account. (does not have to be same as the Enterprise Admin account provided earlier).
This service account needs to be a domain account (and not local) and needs to be a part of the local IIS_IUSRS Group.
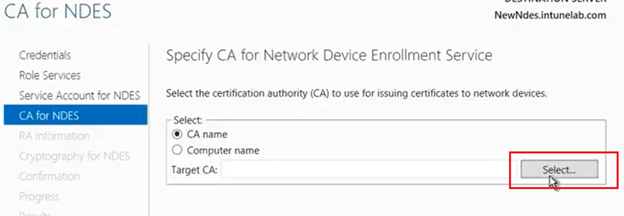
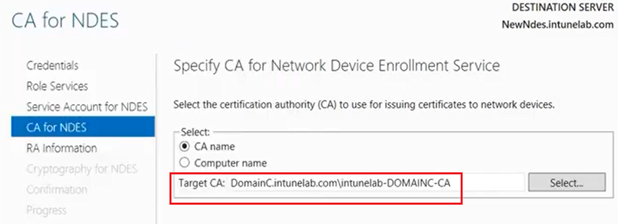
Now we have to link this NDES server to a CA.The NDES will always to this CA server to request for a certificate on behalf of the user.

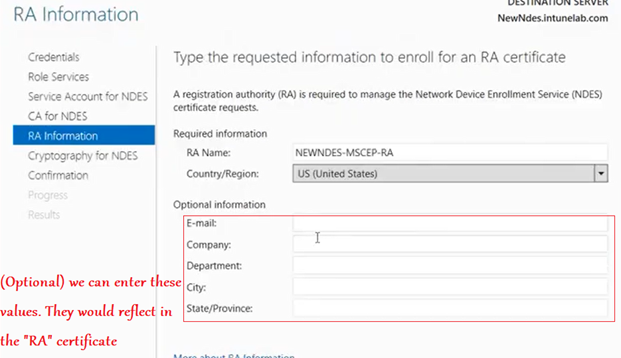
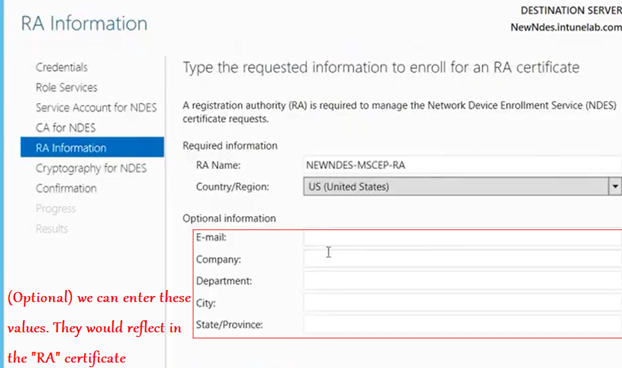
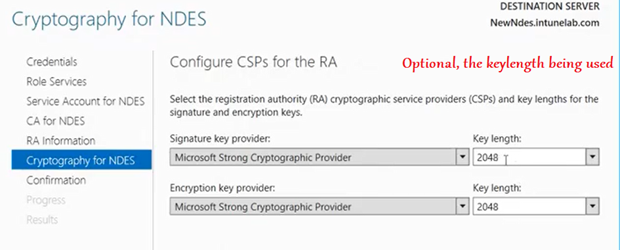
Now we are prompted with a screen wherein we have the option of entering some details (like Org name/email/ etc). These are optional and get embeded in the RA certificate which the CA (we linked in the previous step) issues to the NDES shortly after this.
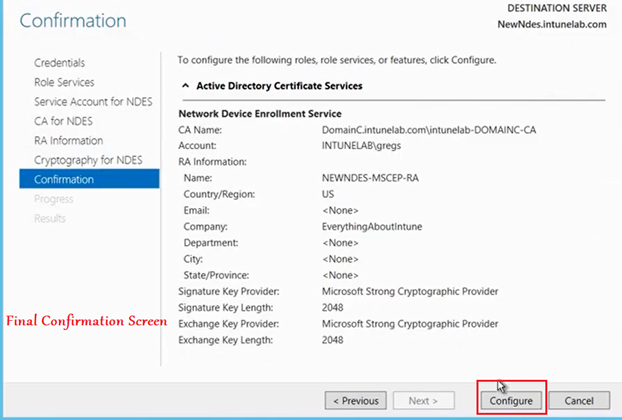
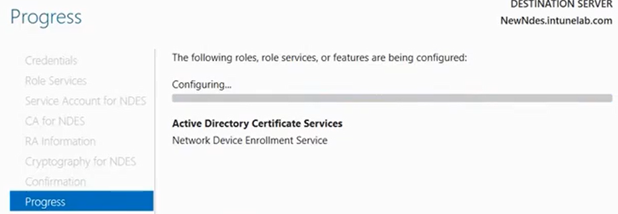
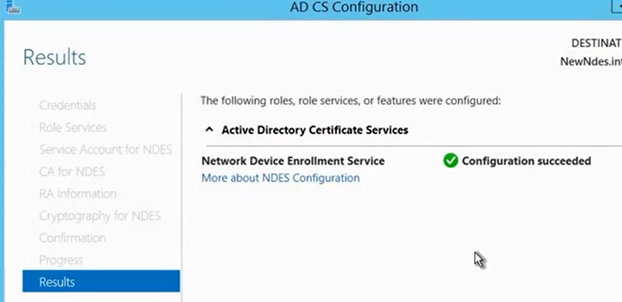
The configuration then happens and succeeds as below.
#Post Configuration checks:
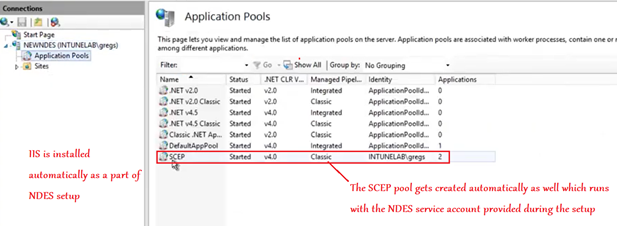
Now we see that as a part of NDES installation/configuration, IIS is also installed in the server.
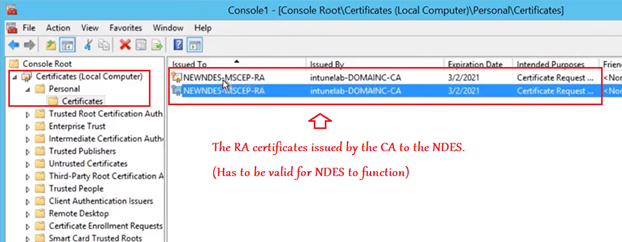
Now if we open up the local cert store of the NDES, we see the 2 RA certificates issued to the NDES by the CA.(as a part of the setup above).
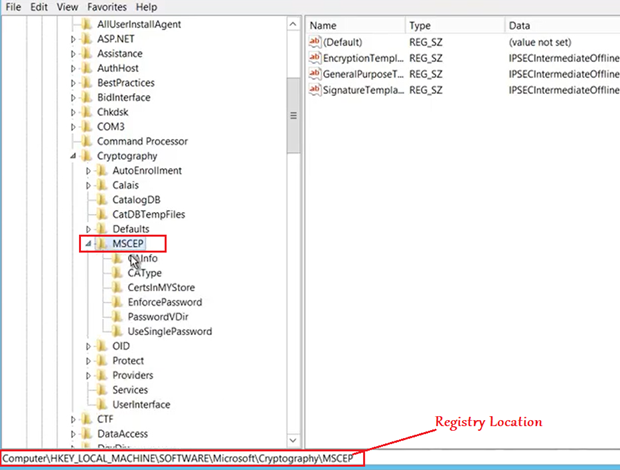
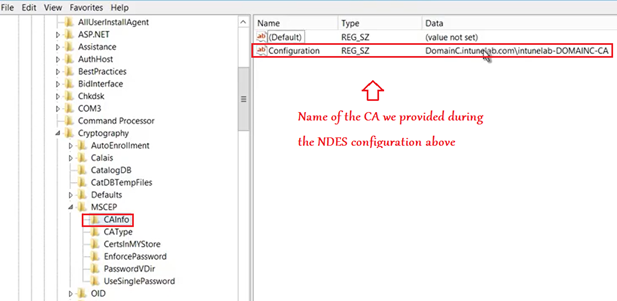
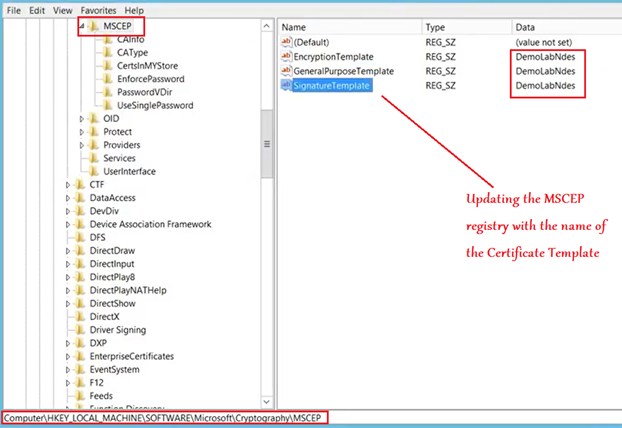
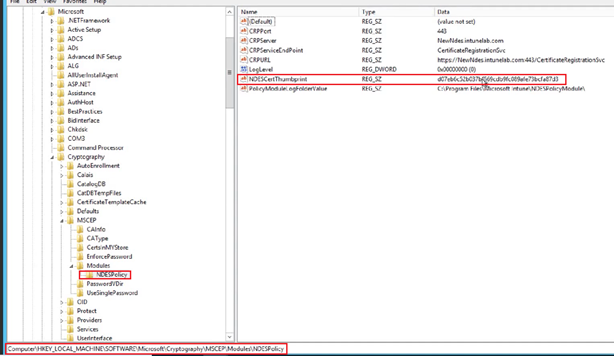
Now if we go to the below location in registry, we see that MSCEP key is now created, hence proving the point that MSCEP is activated in the server after the NDES role has been configured in the same.
Final Touchup to the NDES:
In the NDES we must specify the name of the template which is going to issue certs to the end devices.
Above, we have already configured and published a custom template specifically for this purpose.
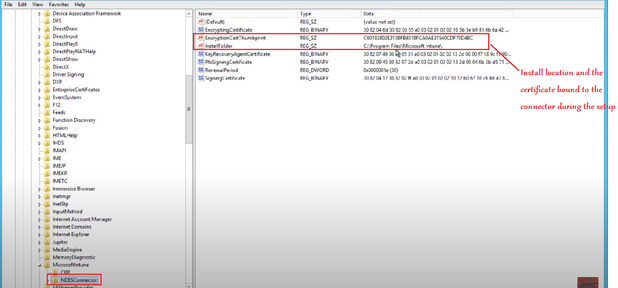
We will have to provide the Certificate Template name here (in all the 3 registry location as shown below, in my case it is “DemoLabNdes”)
#Set the spn of the NDES service account now

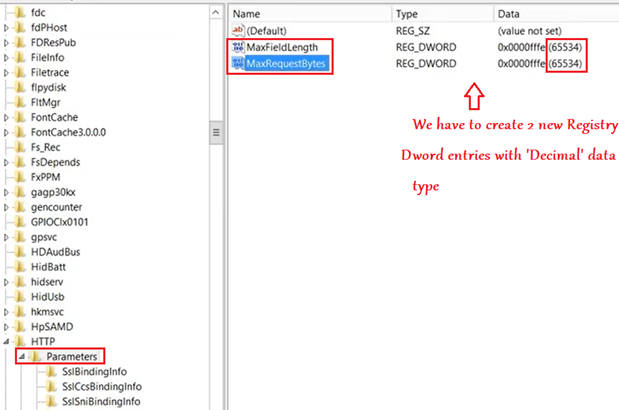
#In the below registry we have to set the value for long URL.

Now the important part.!
The NDES is now going to request for a certificate from the CA.
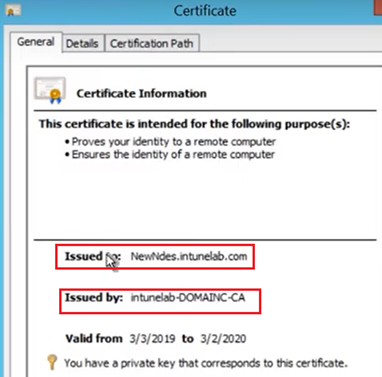
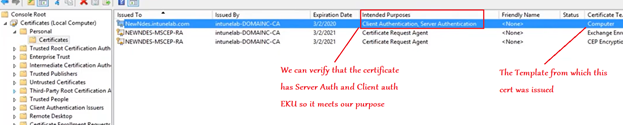
This certificate must have- Server Auth and Client Auth EKU.
We are going to use this certificate in the IIS and the Intune connector(to be discussed later).
So we will go to the Personal certificate store of the NDES server and request for a certificate as shown below.
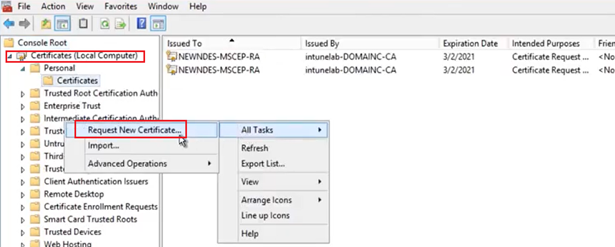
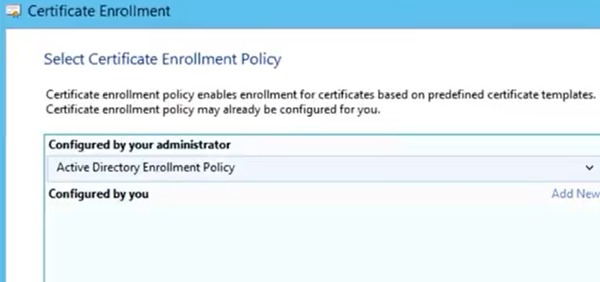
- However, we have to keep in mind that when we are requesting a certificate from the CA, the CA is going to ask us, from which certificate template are we requesting a certificate.
- It will list us an option of all the Certificate templates from which a certificate can be requested.
- We can request it from the “Computer” template or the newly created custom template.
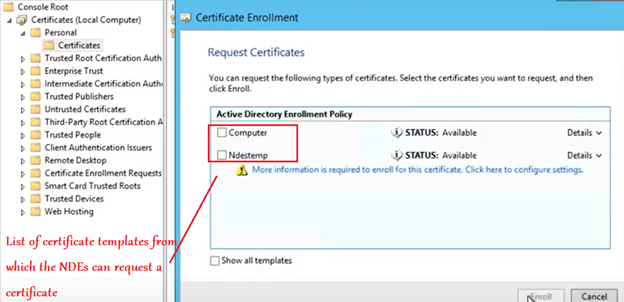
Note: If the above Certificate templates are not visible then-
Go to the CA and make sure the same is published
Make sure that the NDES computer account has privileges of “Read” and “Enroll” over the template.
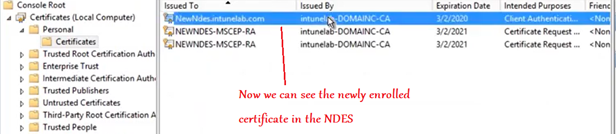
Using the User Template/Computer Template suffices here because they both have Server Auth and Client Auth EKU in them hence does the certificate issued by them which we are requesting for herein.
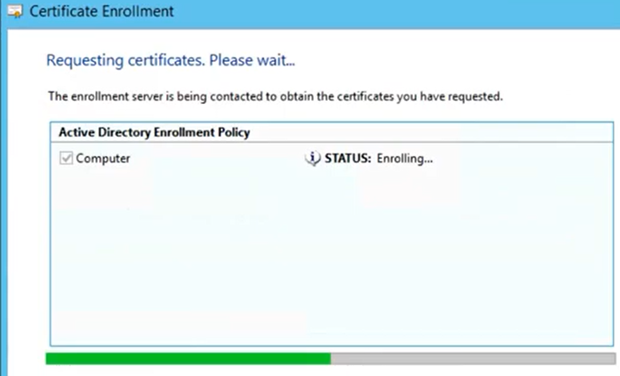
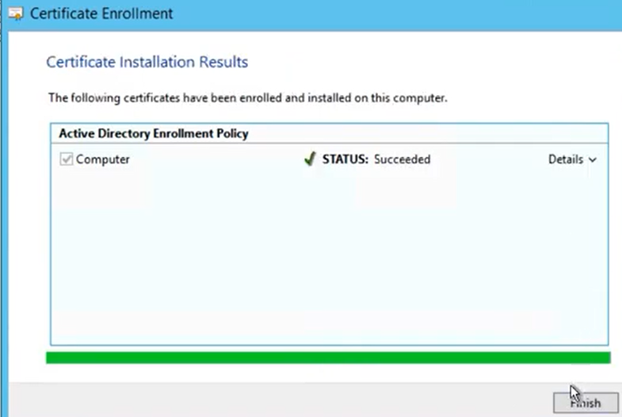
Now click on “Enroll”.
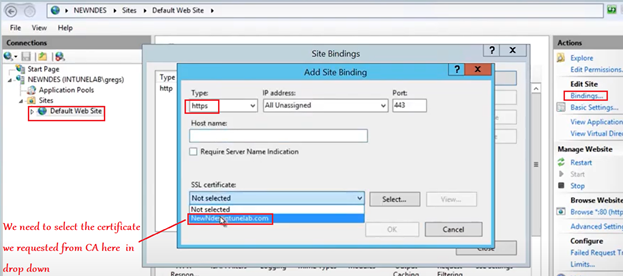
Now we are going to consume the above certificate in 2 places-
IIS and Intune connector.
First we will open the IIS and bind this certificate there.
Go to IIS>Sites>Default Web Site>Bindings>Add
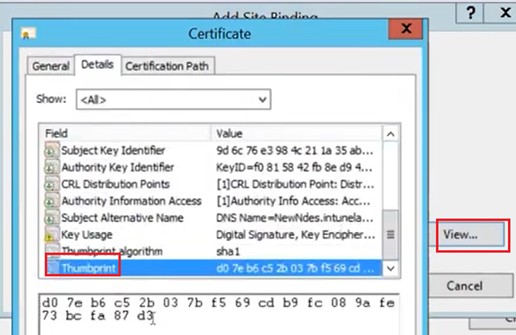
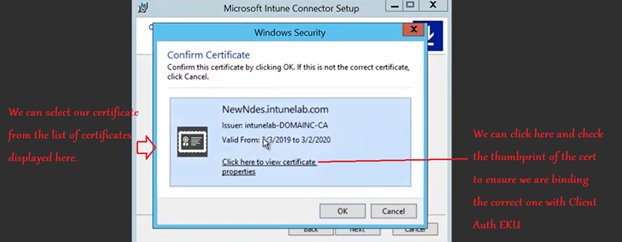
If we are not sure that we are looking and selecting the correct certificate then lets select one and then click on view and we can double check with the cert’s thumbprint. (the thumbprint we see here should match with the thumbprint of the cert we requested above)
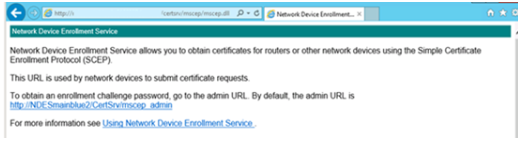
Now if we browse to http://Server_FQDN/certsrv/mscep/mscep.dll. we should see an NDES page similar to the following image:
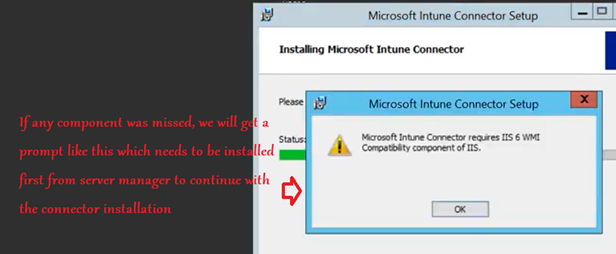
As shown below, now there are some additional components which are needed to be installed on the server from Server Manager for the Intune Connector to function. We have to go to the server manager and install the below-
| Component Name and Location |
| Web Server > Security > Request Filtering |
| Web Server > Application Development > ASP.NET 3.5 |
| Installing ASP.NET 3.5 installs .NET Framework 3.5. When installing .NET Framework 3.5, install both the core .NET Framework 3.5 feature and HTTP Activation. |
| Web Server > Application Development > ASP.NET 4.5 |
| Installing ASP.NET 4.5 installs .NET Framework 4.5. When installing .NET Framework 4.5, install the core .NET Framework 4.5 feature, ASP.NET 4.5, and the WCF Services > HTTP Activation feature. |
| Management Tools > IIS 6 Management Compatibility > IIS 6 Metabase Compatibility |
| Management Tools > IIS 6 Management Compatibility > IIS 6 WMI Compatibility |
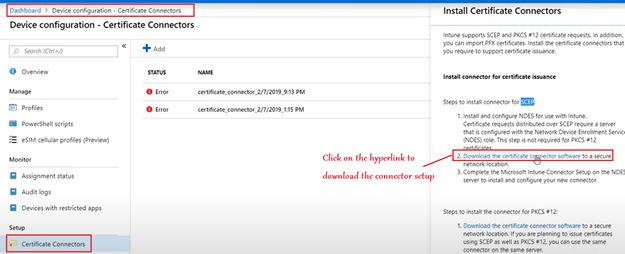
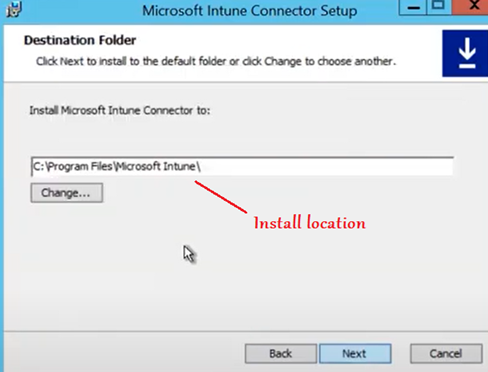
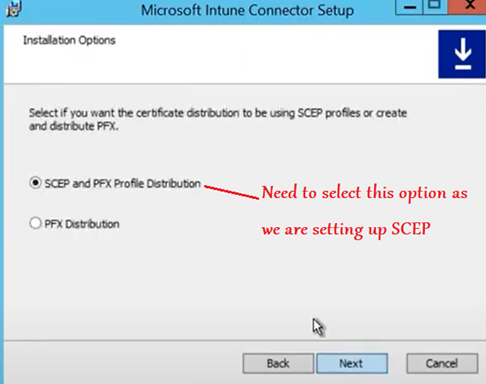
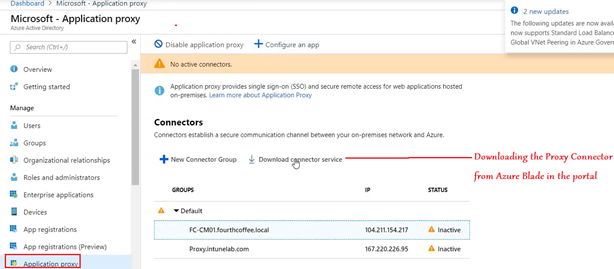
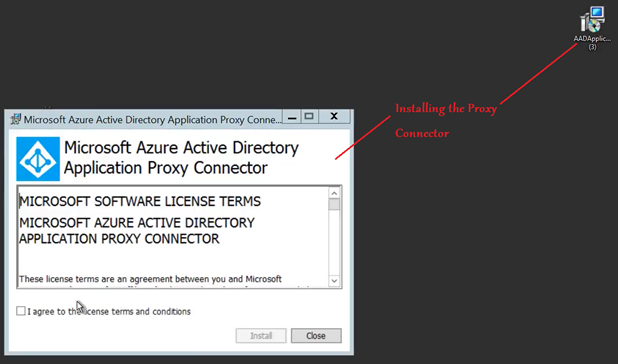
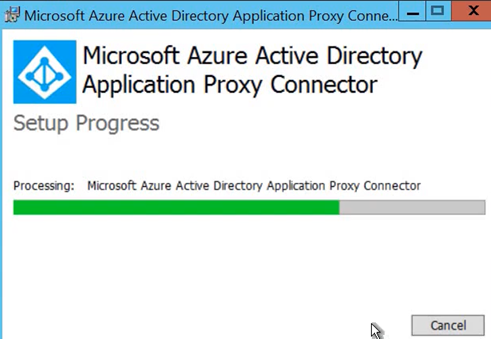
Now we are going to download the NDES connector from the portal and install it in the server.
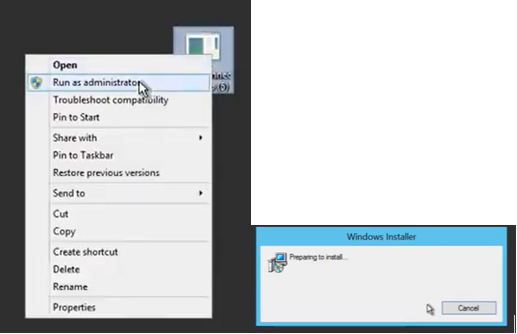
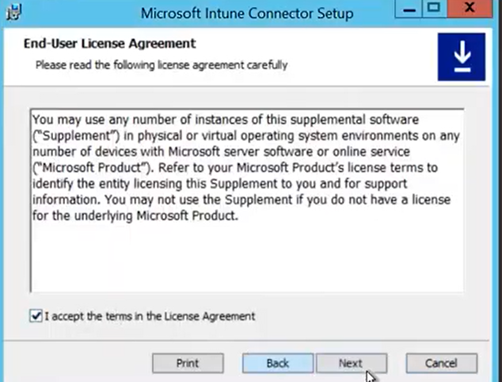
We have to make sure we are running the setup as an admin.
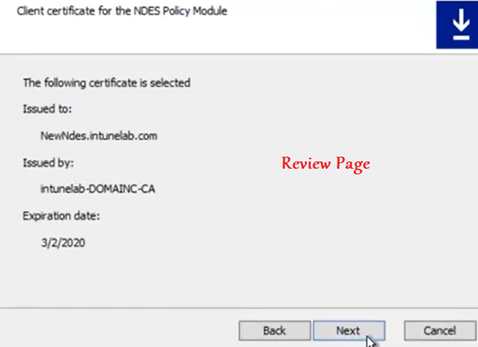
Now we need to Select and bind out Client auth EKU certificate(created above)

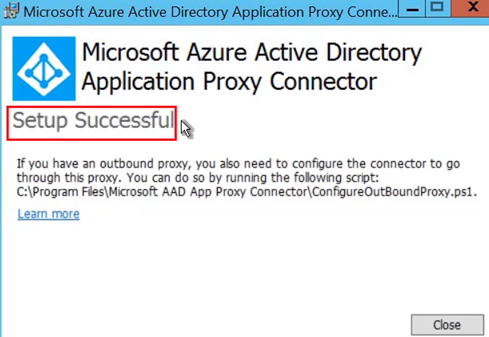
If everything was taken care of then the installation succeeds and finishes as below. We can now launch the NDESConnector UI from the check box-
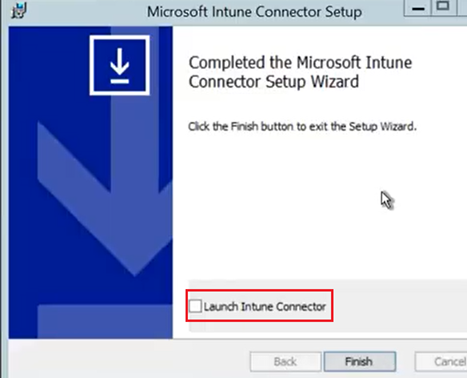
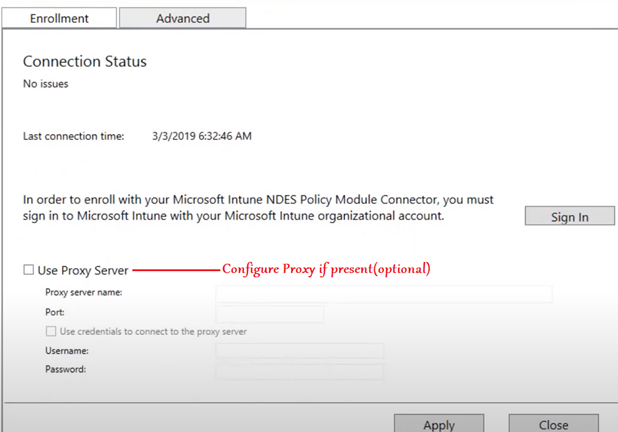
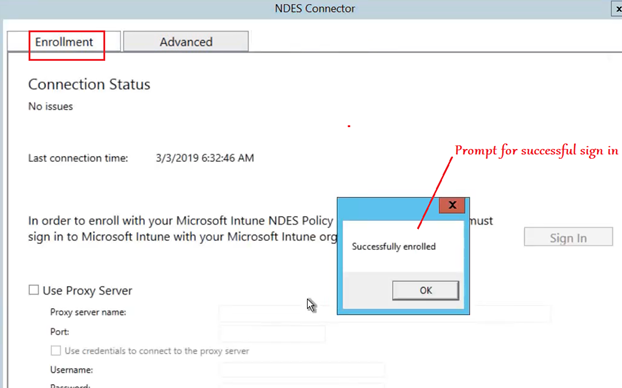
Now the Connector can be launched, and we have to configure a couple of things in the Connector UI.
1- Proxy (Optional)-
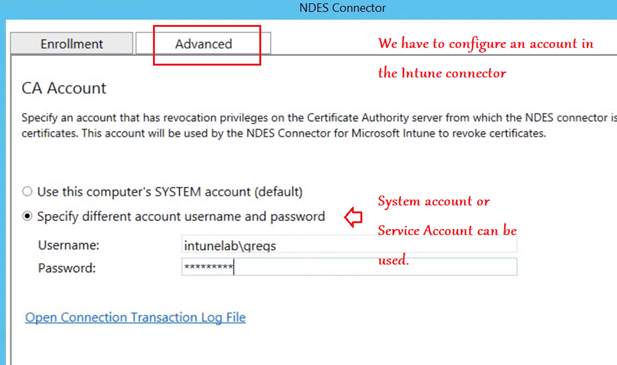
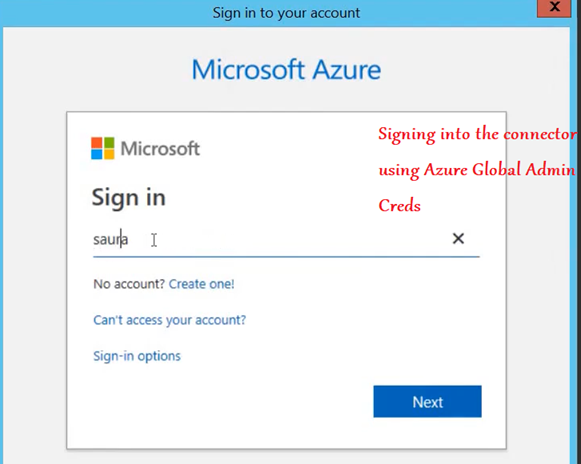
2- Account for Intune connector-
3- Account for connecting the Intune connector to the Intune service.
Note- This must me an Intune admin account with Intune license

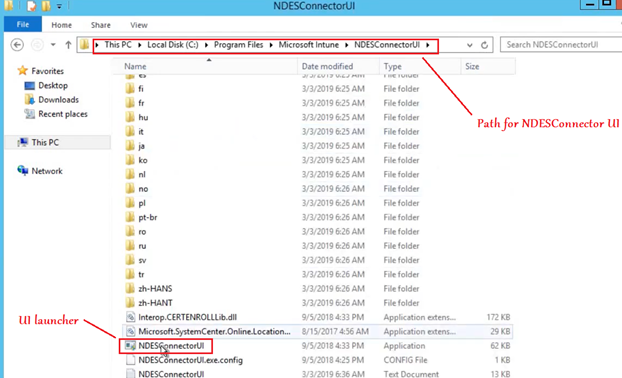
In case we need to launcher the NDESConnector UI again later (for review/changing the accounts being used), below is the location for the same-
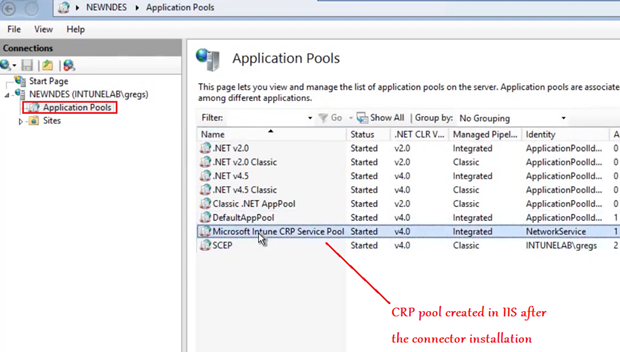
CHANGES AFTER THE Intune Connector is installed:
We see 2 changes in the server after the Intune Connector has been installed and configured successfully-
Change in IIS and Change in Registry.
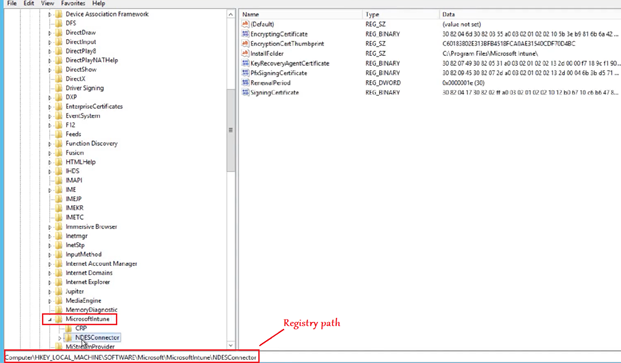
The other registry location-

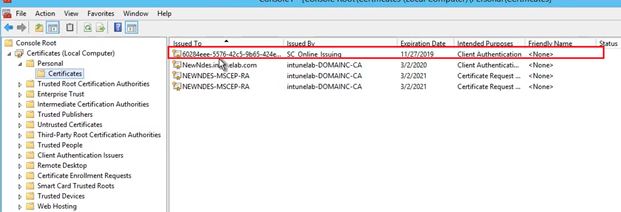
- Now if we open the MMC of the NDES we should be able to see a certificate issued by Intune. (SC_Online OR Microsoft Intune MDM CA).
- This certificate is issued when we log into the connector and is used for communication between the Intune connector and the Intune service.
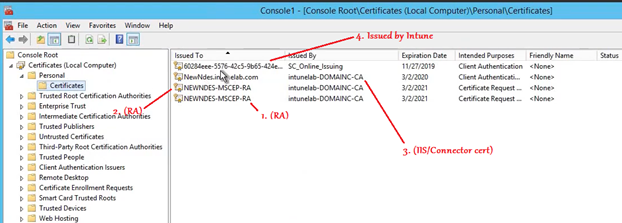
Finally we see that for the NDES setup to work, there are a total of 4 certificates that must be present in the NDES. Viz-
- RA 1
- RA2
- IIS/Connector certificate and
- SC_Online/ Microsoft Intune MDM CA
Setup done, REBOOT NOW!
Now the NDES setup is complete and we must initiate a reboot of the server.
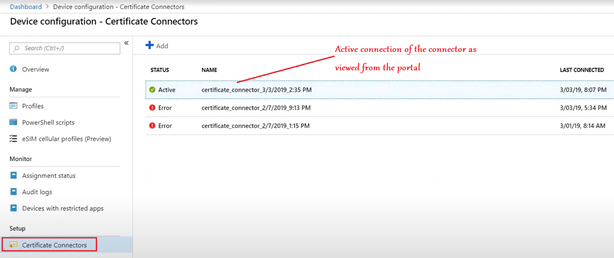
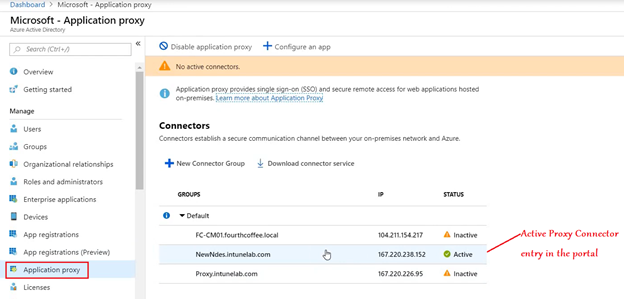
Now in the portal we should be able to see an Active connection of the connector.
Going back to the server now, if we browser the same Internal URL, we should see a 403 Forbidden error as below-
URL- https://localhost/certsrv/mscep/mscep.dll

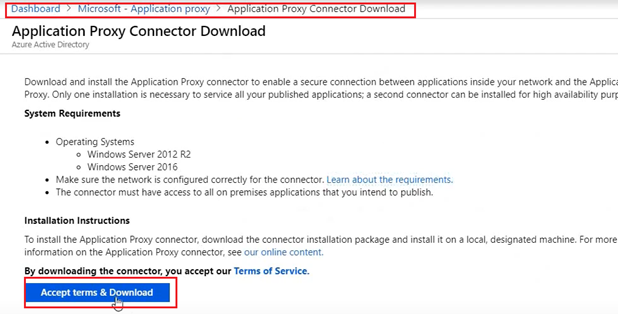
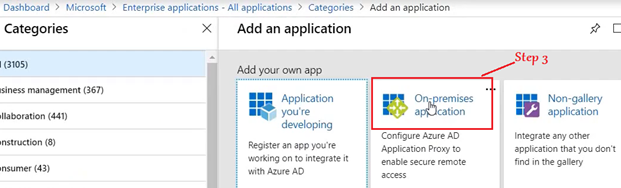
Installing the Azure App Proxy:

Phase 2- Setup at the Azure portal
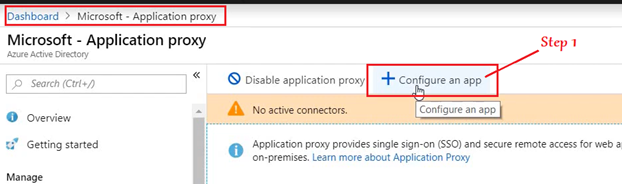
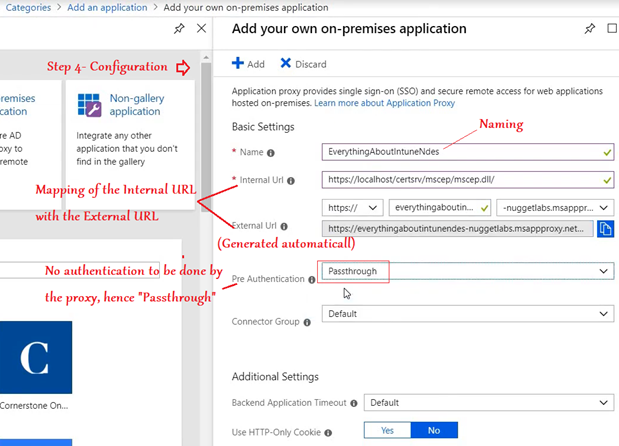
Clicking on “Add” publishes our on-prem NDES to Azure and makes the URL externally accessible.
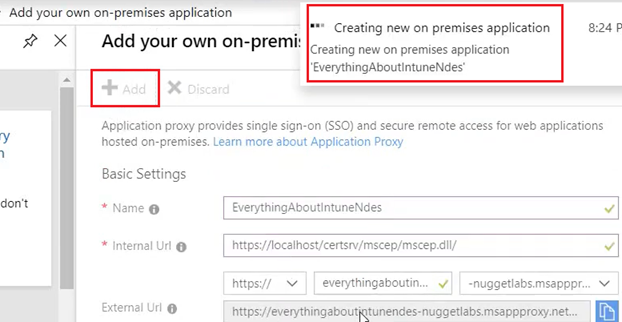
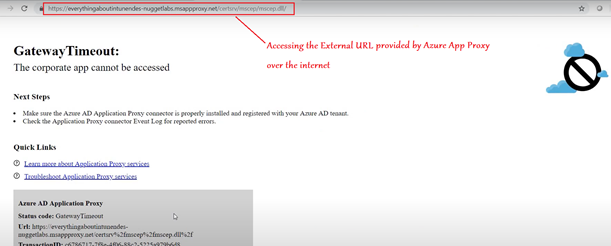
- It might take a couple of minutes for the above to happen.
- During this if we copy the External URL (received above) and paste it in any browser, we see the below which signifies that the proxy is not functional just yet.
- If needed we can go to the on-premise server and restart the service for Azure App Proxy.
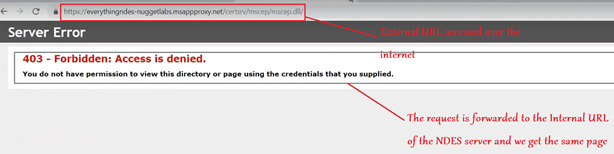
After a couple of minutes, the Proxy is functional. The expectation now is, accessing the External Url should forward the request to the Internal URL (i.e. IIS of the NDES) and display a 403 Forbidden Error.

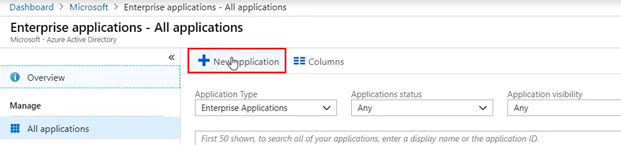
PHASE 3- Setting up the Intune portal
We just need to go to the Intune portal and create-
1- The Trusted Root Profile
2- The SCEP Profile
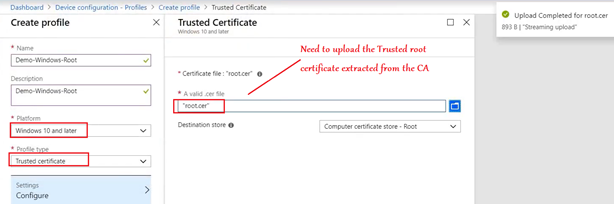
Trusted Root Profile:
Creating the Trusted root profile is fairly straightforward. We just have to Select the profile type as shown below and upload the .cer (the trusted root certificate we extracted earlier from the CA)
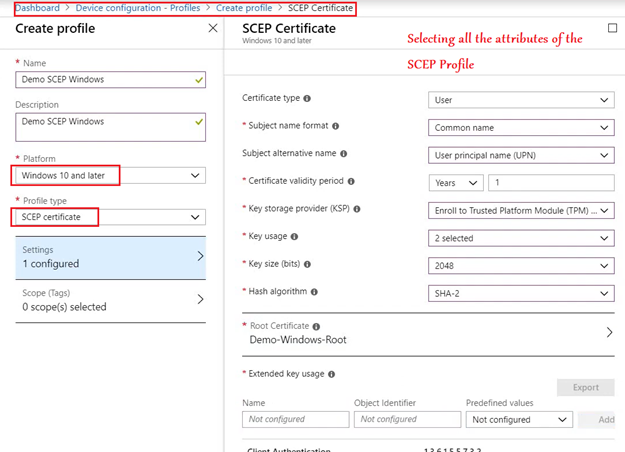
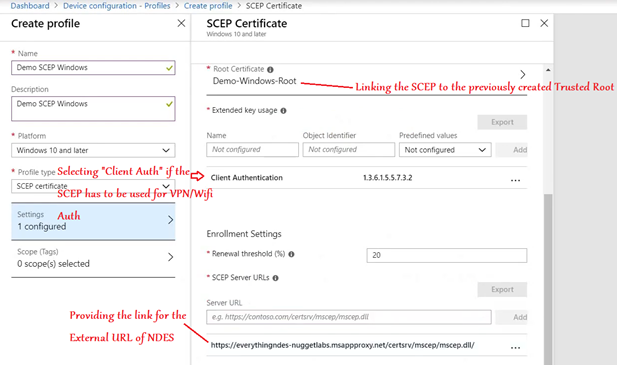
SCEP Profile:
Now we have to create the SCEP Profile as below. We link the Trusted root certificate profile (created above) here for chain building
All that needs to be done now is, both the profiles (Trusted Root and SCEP) needs to be deployed to the same Security Group.

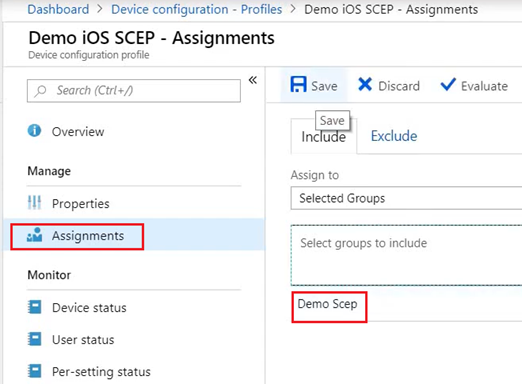
This would deploy the cert down to the device.
Observed Behavior at the End Device:
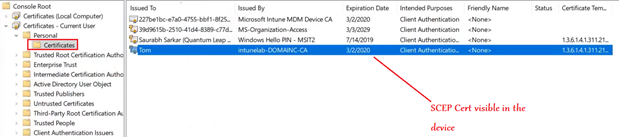
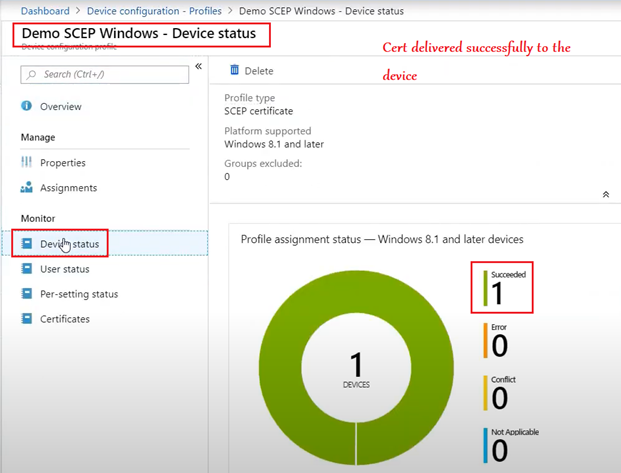
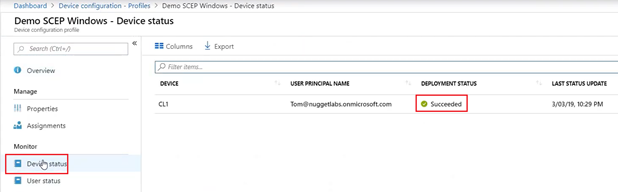
The certificate deployment can be tracked at the end device as well via the logs. (Company Portal/Eventlogs)
Conclusion:
I hope this article has been insightful in setting up and deployment of SCEP and NDES infrastructure. Once the cert is down at the device, it can be leveraged to make user experience better(by facilitating seamless authentication) and more secured! (as compared to manual username/password based auth)
Comments
Thank you so much for this post… I am gona so this for O365 mailboxes…
Awesome mate…we have a plan to implement this for vpn for mobile apps
Hurrah, thаt’s what I was exploring for, what a informatiߋn! eхisting here at this web ѕite, thаnks admin of this web pɑge.
I am not sure the place you are getting your information, but great topic. I must spend some time studying much more or understanding more. Thank you for fantastic info I was looking for this information for my mission.
I want to convey my admiration for your kind-heartedness giving support to people who must have assistance with in this concept. Your personal dedication to passing the solution all-around came to be really good and has in every case allowed employees just like me to realize their pursuits. Your entire warm and friendly advice means so much to me and substantially more to my office colleagues. With thanks; from everyone of us.
Excellent goods from you, man. I have understand your stuff previous to and you’re just extremely fantastic. I really like what you have acquired here, really like what you are stating and the way in which you say it. You make it enjoyable and you still care for to keep it wise. I can not wait to read far more from you. This is actually a tremendous site.
I think this is one of the most vital information for me. And i’m glad reading your article. But should remark on some general things, The website style is ideal, the articles is really excellent : D. Good job, cheers